Dead Sea salt has been cherished for centuries for its incredible skincare benefits. Packed with minerals like magnesium, calcium, and potassium, this natural salt helps to exfoliate, detoxify, and nourish the skin.
One of the best ways to experience its benefits is by making a DIY Dead Sea salt scrub at home.
You’ll learn here how to create a luxurious homemade scrub, its benefits for your skin, and how to use it effectively.

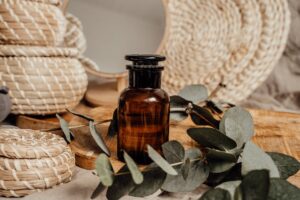
By Freepik
Benefits of Dead Sea Salt for Your Skin
Before diving into the DIY recipe, let’s explore why Dead Sea salt is a skincare good for us:
1. Deep Exfoliation
Dead Sea salt’s fine yet abrasive texture removes dead skin cells, unclogs pores, and promotes skin renewal, leaving your skin smooth and refreshed.
2. Detoxifies the Skin
Rich in minerals, Dead Sea salt draws out toxins and impurities from the skin, helping to prevent breakouts and improve overall skin health.
3. Boosts Hydration
The minerals in Dead Sea salt help retain moisture and balance the skin’s hydration levels, making it especially beneficial for dry or sensitive skin.
4. Reduces Acne and Blemishes
Dead Sea salt has natural antibacterial and anti inflammatory properties that help combat acne, reduce redness, and prevent future breakouts.
5. Soothes Skin Conditions
If you suffer from eczema, psoriasis, or other skin irritations, Dead Sea salt can help calm inflammation and promote healing.
6. Improves Blood Circulation
Massaging a Dead Sea salt scrub into your skin stimulates circulation, which can lead to firmer, healthier looking skin.
7. Promotes Relaxation
The therapeutic properties of Dead Sea salt help relax sore muscles and relieve stress, making your skincare routine feel like a spa experience.
DIY Dead Sea Salt Scrub Recipe
Now that you know the benefits, it’s time to make your own Dead Sea salt scrub with simple, natural ingredients.
Ingredients:
-
1 cup Dead Sea salt (fine or coarse, depending on your preference)
-
½ cup carrier oil (such as coconut oil, olive oil, or almond oil)
-
10-15 drops of essential oil (lavender, tea tree, or peppermint for added benefits)
-
1 tablespoon honey (optional, for added moisture and antibacterial properties)
-
1 teaspoon vitamin E oil (optional, for extra nourishment)
Instructions:
-
Choose the Right Salt Texture
-
If you have sensitive skin, opt for finely ground Dead Sea salt for a gentler exfoliation.
-
Coarse salt works best for rough areas like elbows, knees, and feet.
-
-
Mix the Ingredients
-
In a mixing bowl, combine the Dead Sea salt and carrier oil. Stir well until fully blended.
-
Add the essential oil of your choice and mix again.
-
If using honey and vitamin E oil, add them to the mixture and stir until the scrub has a uniform consistency.
-
-
Store the Scrub Properly
-
Transfer the scrub into an airtight glass jar or container.
-
Store it in a cool, dry place. If using fresh ingredients like honey, refrigerate for extended shelf life.
-
How to Use Your Dead Sea Salt Scrub
To maximize the benefits of your homemade scrub, follow these simple steps:
1. Prepare Your Skin
-
Use the scrub on damp skin after showering when your pores are open for better absorption.
2. Apply Gently
-
Scoop a small amount of scrub and massage it onto your skin using circular motions.
-
Focus on rough areas but avoid applying too much pressure, especially on sensitive skin.
3. Let It Sit
-
Allow the scrub to sit on your skin for 2-3 minutes to let the minerals absorb.
4. Rinse and Moisturize
-
Rinse thoroughly with warm water and pat dry.
-
Apply a moisturizer or body oil to lock in hydration.
Additional Tips for Best Results
-
Use 2-3 times per week for soft, radiant skin.
-
Avoid using on broken or irritated skin to prevent discomfort.
-
Customize your scrub by adding ingredients like coffee grounds for extra exfoliation or aloe vera for soothing benefits.

Conclusion
Making your own Dead Sea salt scrub at home is an easy, cost effective way to enjoy the skin nourishing benefits of this mineral rich salt.
Just a few simple ingredients, you can create a luxurious scrub that exfoliates, detoxifies, and hydrates your skin. Try this DIY recipe today and experience spa like pampering from the comfort of your home!
Looking for more natural skincare tips? Stay tuned for more DIY beauty recipes!